


A Milk Paint Tutorial for Control Freaks
Are you a control freak when it comes to painting furniture? Or anywhere else in your life for that matter? Me too! When I have a vision of how I want a painted piece of furniture to turn out nothing short of exactly how I imagined will do. I have learned however, sometimes you have to let loose and let the paint and furniture do the talking. That is especially true when painting with milk paint. There are 2 basic looks with milk paint. Chippy and not Chippy. You can check out my Milk Paint 101 tutorial to see how to make milk paint chippy. And my Milk Paint 101 1/2 tutorial for how to prevent chippy with the addition of Extra Bond.

But what if you just want a little bit of chipping? Or some crackling? I have your secret weapon!

I have been spraying shellac on furniture for some time now. Even when I painted mostly with chalk paints. I used it to prevent bleed through of old stains through new paint. It works great to block stains, oil and any unsightly, weird and unidentifiable stuff from showing through all that fresh paint.
And then I found out from Sausha at Sweet Pickins that you can also use it to control the amount of chippyness you get from milk paint. I always use the spray version. It’s fast and it dries fast too and I generally use two coats. And then I am ready to hit it with the milk paint without extra bond. No extra bond! I know this is really living on the edge for you inner control freak. But you can do it!
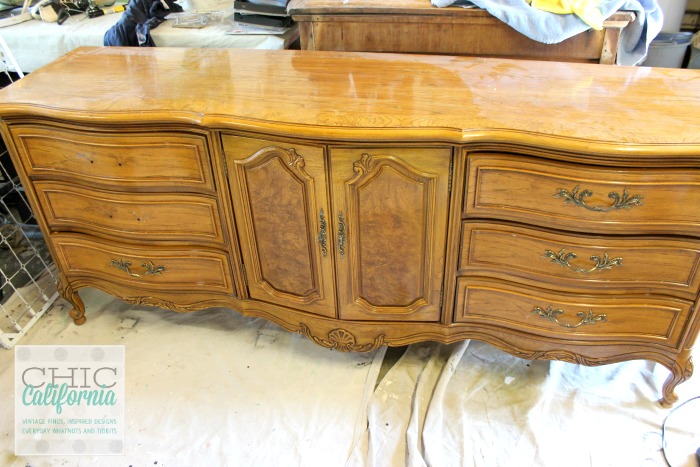
I applied 2 coats of shellac to this dresser in order to prep it for paint and prevent anything weird from revealing itself through the finish. And then I mixed up my Sweet Pickins Milk Paint in Sweetie Jane.

(Sweet Pickins)
I did not intend to paint the inner drawers on this piece. I was going to leave them alone. SO I only sprayed shellac on the body of this piece. And then I started painting and one thing led to another and I painted the inner drawers. So this turned into a perfect case study of the difference between using shellac before milk paint and not using it at all.


See how chippy the inside of this piece got without shellac? It’s way chippier than the outside.

The shellac can also give you a crackly effect, which looks especially great after you age and distress your piece. I used clear wax followed by aging dust on this piece. I love how the aging dust works its way into all the cracks and crevices.

You can even paint the hardware using milk paint. It sticks and makes it look great! I love adding extra aging dust around the handles and drawer pulls. Anyplace where a piece would naturally get more wear and tear.

Here are a few more beauty shots of this gorgeous dresser for you!


Are all you control freaks out there are ready to throw caution to the wind and give it a try?





 chiccalifornia
 27
27 1
1


Awesome!
Thanks Michelle!
This is beautiful! I am new to using Milk Paint, so I’m wondering….did you also distress it or is that the way it chipped? What is aging dust and how is it applied? Thanks!
Hi Pam! I did do a little distressing around the edges with sandpaper. But the chippy is all milk paint. The aging dust that I used is from Amy Howard Home. It is a grayish brown powder that you can use after you wax to add a little “dirt” to the details of your furniture. I use a chip brush and dip it in a little clear wax and then dip it in the dust to work the dirt into the furniture. Then I take a rag and wipe away any excess. I love using aging dust instead of dark wax to antique a piece of furniture. I think the look is much more authentic.
Oh what a beautiful piece this is and such a great informational article. I have not yet used milk paint but you make me want to try now. I have bleed through issues too but only on walnut pieces. Thanks for the advice.
Is shellac cheaper than using the bonding products?
Shellac runs about $7-9 a spray can. But it works diffently than the bonding agent. I use the bonding agent when I don’t want my piece to be chippy at all. I use shellac when I want to control the amount of chippy.
I stripped veneer from a dining table top, then stained and applied a couple of coats of Shellac. I wanted it to chip, but it did not. I’m not sure what to do next…possibly just distress it. Since it already has one coat of milk paint, is there anything I can do at this point to make it chip? Did I not use enough Shellac to cause chipping since it was raw wood?
Pam, sometimes it just doesn’t chip, no rhyme or reason. But you can try to help it along. Here are 3 things to try: I have used masking tape (or painters tape but the masking tape is stickier ) on a piece that didn’t chip. I just tear off pieces and rub it on the area I want it to chip, them rip it away like you are waxing a leg! Sometimes this helps it along. Sometimes nothing happens on the first coat of milk paint, but the second coat is the one that starts to make things chippy. So maybe try to add another coat. 3rd option: run a paint scraper along the surface. Again, kind of like the masking tape sometimes it gives it a start. Let me know how it works.
Did you sand this piece before shellac or not since it had a shiny surface?
I didn’t do anything to prep this piece. Just sprayed it with shellac, let it dry and then started painting