Hi There! As promised a tutorial on making a union jack design. I probably should have done this post before I showed you the before and after. But as I was writing yesterday’s post I realized that maybe a tutorial was in order. For some, its a really simple design and a tutorial is probably not needed. But I am a very visual person and I like to know the details. So for those visual diy’ers out there this is for you.
Here is what you will need:
Frog Tape
Two shades of Gray Paint (I used Annie Sloan Paris Gray and Ce Ce Caldwell’s Pittsburgh Gray and One Shade of White Paint (Annie Sloan Old White)
Ruler
Exacto Knife
This first thing you want to do is paint your base color and let it dry. This is the color that will be under the tape. I used Annie Sloan Old White.

It doesn’t need to be a perfect coat of paint. You will distress your Union Jack when it is all done so perfect lines and perfectly smooth finishes are not necessary.
When your base color is dry get your frog tape ready. This is pretty easy to eye ball or if you want to be really exact you could measure. You are going to apply your first 2 pieces of tape vertically. They should be pretty centered with a space between the tape. The amount of space can vary depending on how big your surface is.

Make sure you press your tape into any ridges so your paint doesn’t get under. But again your going to sand and distress your design at the end so don’t worry too much about it.

You will do the same thing running horizontally crossing your other 2 pieces of tape.
Next the diagonal pieces. This is where I used a ruler just to line things up.
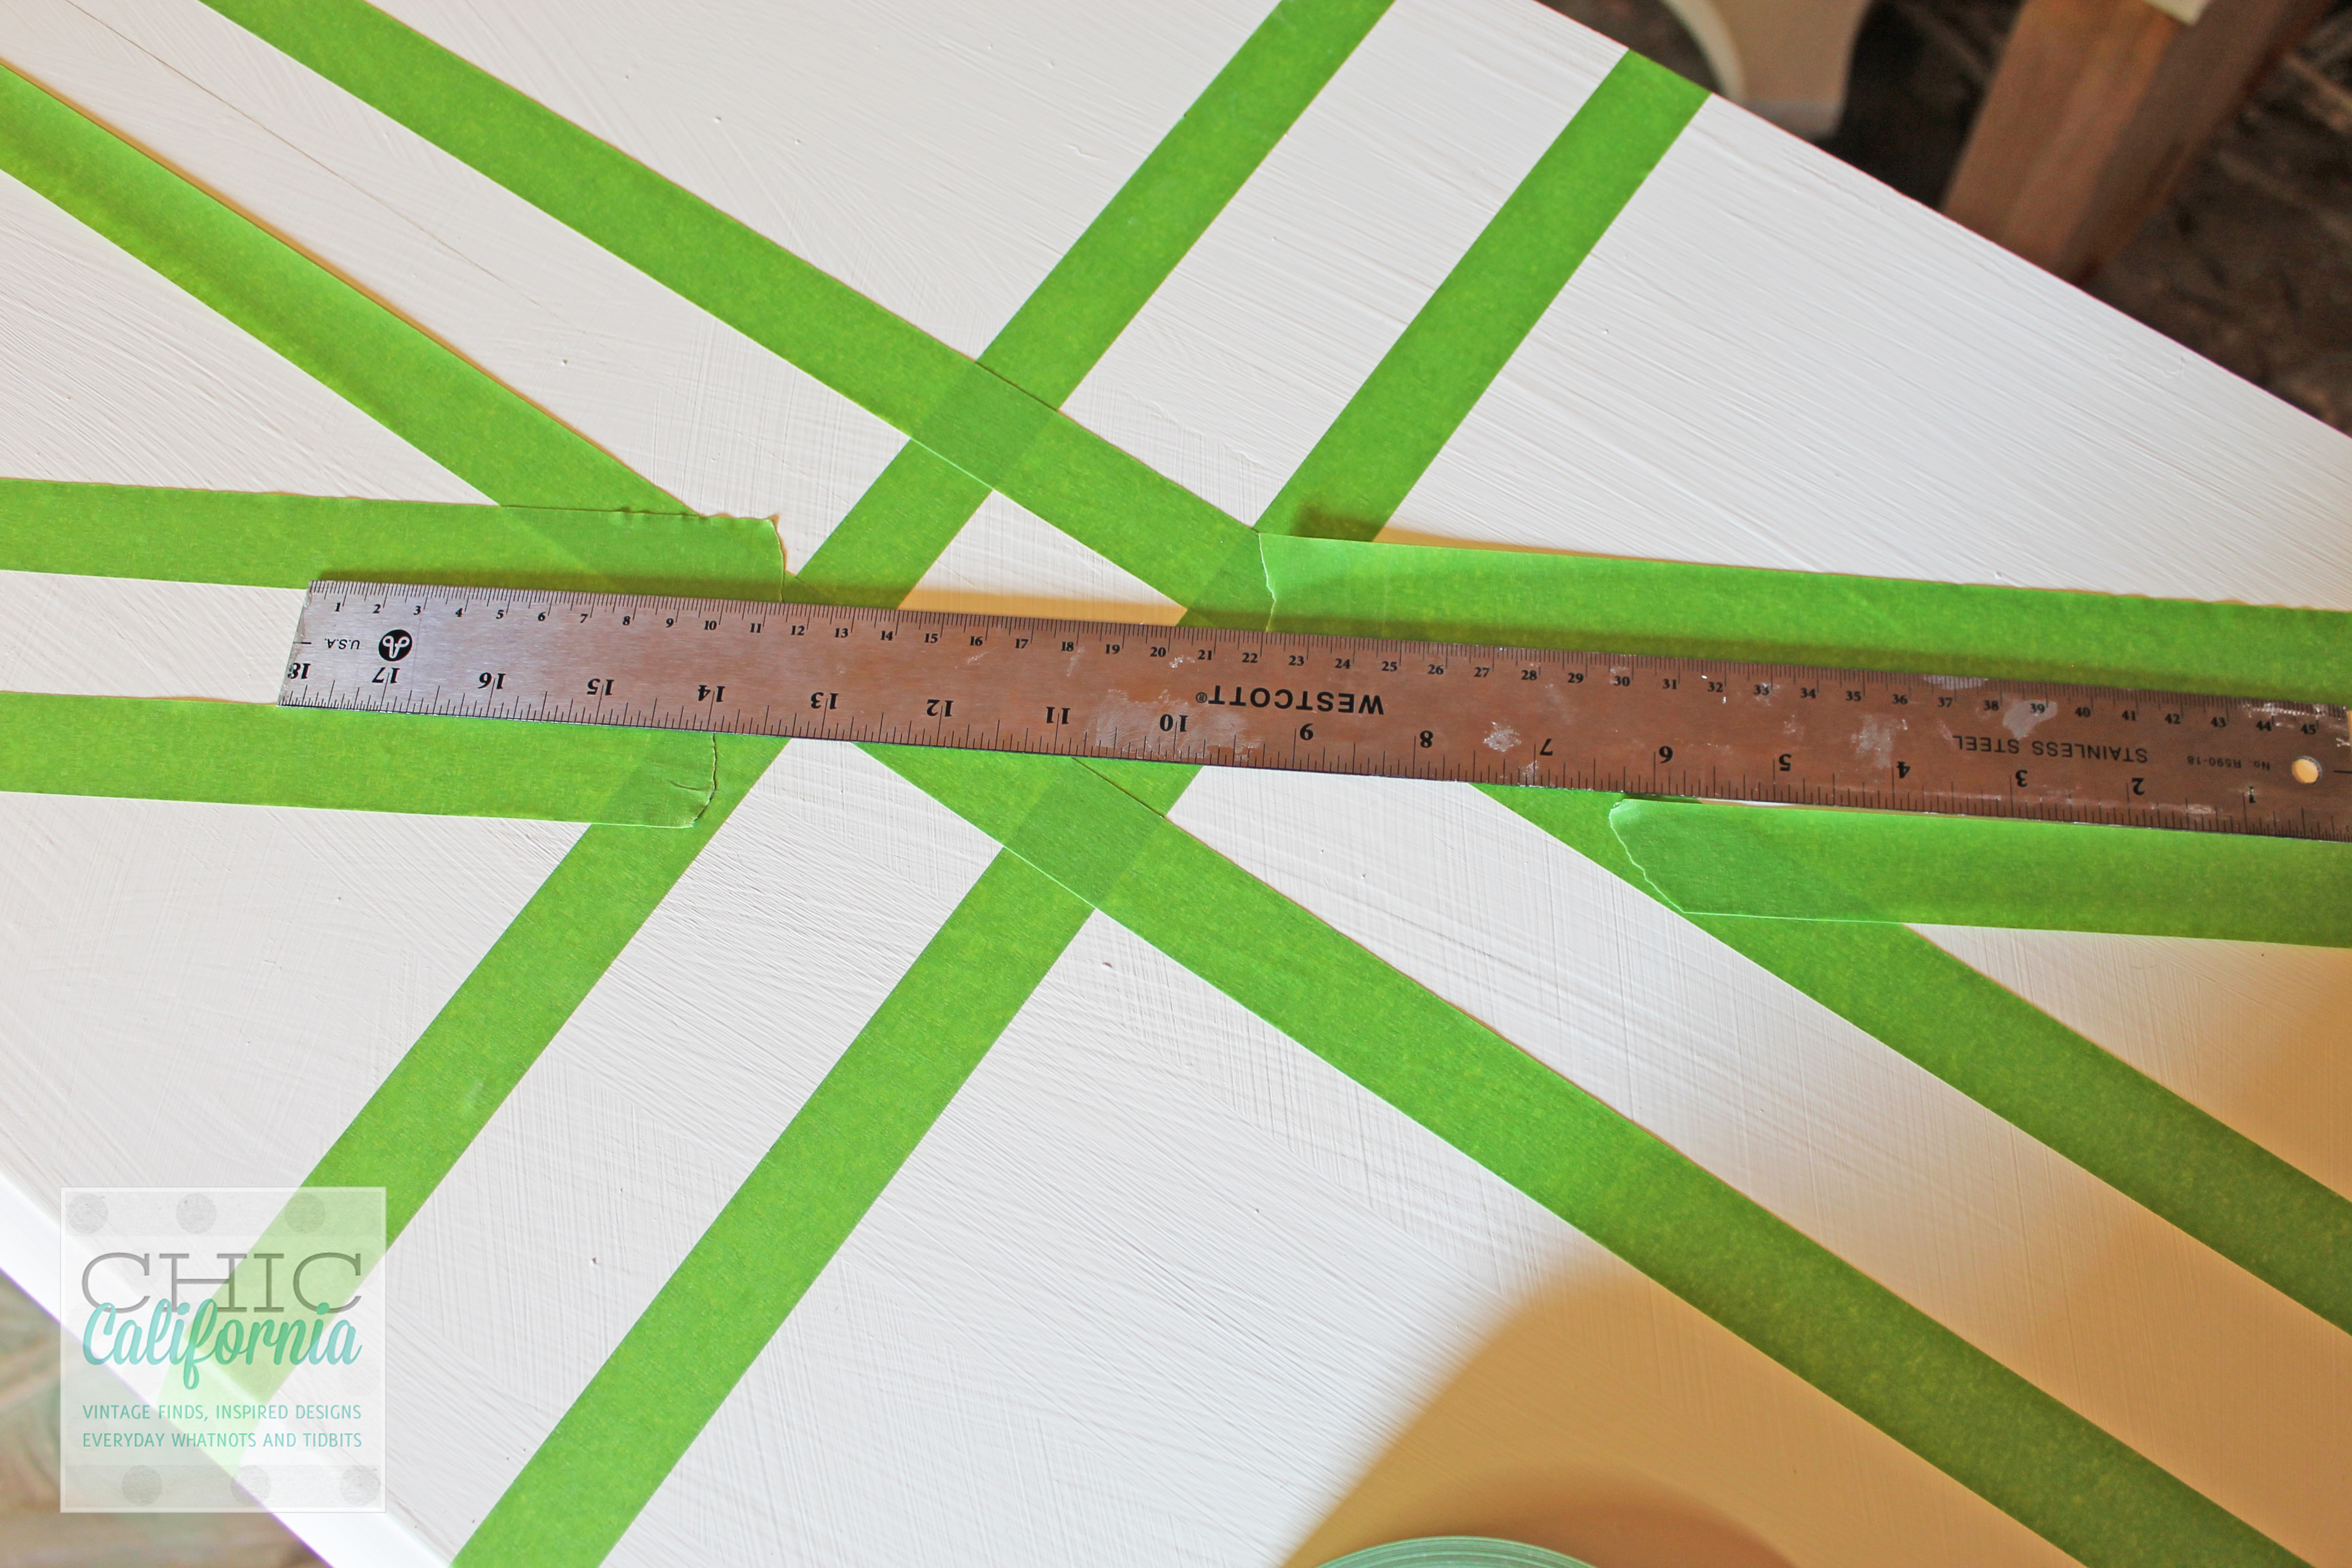
Run your tape corner to corner stopping at your horizontal piece. Then run another piece of tape on the top side and opposite bottom side of your tape. Confused? A Union Jack is thicker across the diagonal.

See how I doubled it up on opposite sides? Easier to see than to explain.
Now you have those original vertical and horizontal pieces cutting across the center. You will need to cut those pieces of tape out.

Line up your straight edge and lightly cut into the tape to remove it. Don’t press too hard because you don’t want to cut into your piece of furniture.
Then just use the edge of your exact knife to peel up the edges.

It’s time to paint!


I used Paris Gray for the stripes and Pittsburgh Gray for the triangles. Remember under the tape will remain white.

Here is the most important tip! Peel the tape off while it is still wet. You will get nice straight lines that way.

Allow your paint to dry and then break out the sand paper. I like 220 grit. It does a good job smoothing the paint while distressing. Seal your piece with a wax finish. I used Annie Sloan Clear Wax. And you’re done.

I’m Linking Up!

Read more at http://diyshowoff.com/2013/11/24/that-diy-party-diy-home/#Js651cQW49vukeAB.99


 Hello There! Welcome to Chic California. I'm an Ohio girl transplanted to California and enjoying the California lifestyle. I love to write, craft, design and refurbish previously loved furniture. I love the style of California and I hope to share that with you. Chic California is all about sunshine, sand, and the outdoor lifestyle. It's a little bit Chic, a little bit Shabby, and little bit Surfer all rolled into one. Enjoy!
  chiccalifornia
 2
2 1
1


WAY COOL, especially the corners Michelle
That is so cool - and I’ll be pinning it today for a later time
PS I found your link at http://www.livelaughrowe.com/