Dollar Store DIY: Vintage Locker Bins
When I gave my office a makeover this past fall I stocked my shelves with lots of Ikea boxes for storage. I realized a few days ago that I needed some extra storage for markers, pens and scissors. But I wanted easy access to them and I am maxed out on my Ikea storage. I needed a little something different before my office just looks like a display right out of Ikea! When I saw some bins at the dollar store the other day I knew I could do some Dollar Store DIY.

The Dollar Store was loaded up on storage bins and containers. When I stumbled upon these I knew they would make perfect faux, vintage style locker bins.
Here’s what you will need:
Plastic Containers: from the Dollar Tree or if you can’t get to a Dollar Tree you can get them HERE
Spray Paint: I used Rustoleum Universal Spray Paint in Antique Nickel
Locker Labels: You can find these HERE or HERE
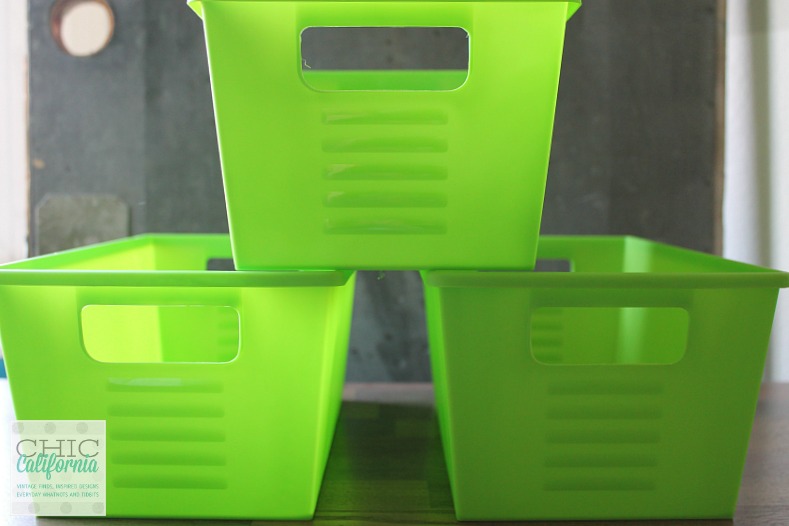
Only one problem, they were neon green and plastic. Not exactly vintage looking.

But with a little of my favorite spray paint, I could fix that problem. I used Rustoleum Flat Antique Nickel to get the perfect metal look. I love this paint because you can use it on so many surfaces and it sticks really well.

I spray painted the sides and the inside and allowed them to dry. And then I flipped them over and sprayed the bottoms and under the lip of the bin to hide all that green.

Update: I no longer sell these tags that I used but I have linked up some other tags you could use here and here. To attach the tags I poked a hole through the plastic bin with a large upholstery needle. And then used some twine to tie the tag onto the bin. Or if you get real metal locker labels you can hot glue them on your bin.

I separated my markers and supplies into old cans and placed them in the bins. Now I have plenty of room for more supplies and I can easily see what I have.

It also breaks up all that Ikea storage!

If you like this Dollar Store DIY, I’d love for you to share it!

Like this Post? Check these out!



LOVE this idea! I never would have thought to use those. Thanks for sharing!
What a great idea! I will have to give this one a try. Hopefully, our Dollar Store has these same buckets. Thanks for sharing:)
I love them! Such a great and inexpensive storage solution! I updated these same bins and have them in my medicine cabinet! They are so versatile!
Awesome idea! Love it!
I love your craft/office room. I have become overwhelmed with all my craft supplies and didn’t know where to start. I have 2 bookcases I bought and assembled, but just stacked stuff. I make jewelry and like to sew, therefore I have as lot of inventory!!! Thank you for the great idea on how to approach it. My bookcases are not real wood, so not sure what type of paint to use. They are dark now and want to lighten them up. If you have any ideas, please share. Tammyany
chiccalifornia says
Thanks Tammy! I’m so glad you like it! So my bookcases are from ikea so they are not real wood either. But they were already white so I didn’t have to paint them. But the desk is also from ikea and not real wood. I painted it using a chalk/clay based paint from American Paint Co. It sticks to everything. So look for a chalk paint/clay based paint like American Paint Co., Annie Sloan, Ce Ce Caldwells are some brands I like. Hope that helps 🙂
What an awesome idea! I love how these look. I’m sharing your project on my FB page tomorrow afternoon!
chiccalifornia says
Thanks so much for the share!
Is there any way to purchase some of the vintage style tags from your retail area? Thanks!
chiccalifornia says
Working at that! I’ll let you know asap when they are available.
I am so glad that we will be able to purchase the tags. I was just in the process of looking over your website for them. Yippee!!
Elba Iris says
I love you ideas. .I got a dollar store like five minutes from me. .I spend a lot of money there, but I love it !!! A lot of things to do
chiccalifornia says
Thanks, I’m so glad you liked it!
Fabulous idea! Pinning and sharing everywhere!
~ Ashley
chiccalifornia says
Thanks Ashley!
Hi I love your room, and these little bins are perfect! I’m interested in your little tags, you say you sell them? How would I get my hands on them :)?
AH HAAA! I have a gagillion of these out in the garage and access to silver/aluminum metallic spray paint. What an inspiration! Thank you. AND I could actually walk to the Dollar Tree should I need more!!!
Comet says
Would you be able to sell the tags using PAYPAL as a payment method? Or happy to do money order—My mom grew up in Allentown and these remind me of her dads factory there! Thanks—-
Great idea - smartness! What about chipping? Will this paint chip from dings and dangs - you know how teenagers can get when you tell them to clean their room - they just put everything in the closest basket - ignoring the already pre-labeled that you spent eternity making “basket” to store their “stuff”. Is there such a spray paint that can handle the dings and dangs? Thanks for sharing your ideas. Great site! Adios, glad
chiccalifornia says
Thanks Glad, The spray paint that I used I have found to be very durable. Even on plastic. I have used it on outdoor plastic chairs and it has held up pretty well. Which is a pretty tough test for spray paint. Although, I can’t guarantee it against the damage teenagers can do! Maybe just keep a can handy for touchups!
Fabulous
Where do you sell retail - love the tags. Teaches me to look at things with more ‘potential’ than I usually do. Have never painted plastic goods, but will try sometime soon. My daughter has very small house & uses lots of ‘bins’ etc., so pinned this for her to see. We used a large number of fabric bins from the $1 store that fit inside the chalk painted 70s dresser - redone for a new baby & baby clothes.
Is there a reason why you did not use their galvanized hammered look spray paint? Is this part of a promotion for that particular paint? Sorry, I am not trying to be impertinent here but want to get as close to the galvanized look as I can. I was only able to find the satin nickel color in my area.how diff. is that from the color you chose in that same line? thanx
chiccalifornia says
Hi There! Nope, there was no particular reason that I chose the flat antique nickel. Other than, I just happened to see it on the shelf and thought that would look good and authentically antique. I had never used it before this project and it was not a sponsored post so I could have chosen anything. I think the galvanized hammered look would be great too. Even the satin nickel would be good. I’ve never done a side by side comparison of the spray paint finishes so I’m not sure how different it would be. But I think any type of “metal” finish spray paint would work 🙂
I like, I like, I LIKE!!!
On my way to the dollar store now!
chiccalifornia says
Thanks so much! Have fun shopping.
Thank you for sharing this! I have quite a lot of these dollar store bins in our house - all hiding in closets since they’re so ugly! 🙂 Although I’ve seen other suggestions on how to make it look like metal, they’ve all included several steps. Your’s involves only ONE step! Yay! Thank you.
wow ! I am inspired I NEVER would have thought this would work but it looks AMAZING.
I did this and the paint scratches off. I found your post when googling to see if there was anyone else with the same problem. I used rustoleum specifically for plastic….did you have this problem?
chiccalifornia says
Fortunately I have not any any issues with the paint scratching off. I wonder if the bins had something on them that would prevent the paint from adhering well. Like a coating or something?
Jen says
I just read the question, and your answer makes sense. Maybe try spraying a single side, give about six hours, then test. If works, great! Finish ONE, then let it cure over night. If it DOES do this (again), lightly use sand the plastic, wipe down, then try again. I’ve had to deal with similar issues in the past!
I have done this with a larger locker bin and used the same paint but hammered antique pewter. They turned out great, but my problem now is I can’t seem to find the large ones (18.25×14.25×9). If you know of any place to purchase these I would appreciate it.
chiccalifornia says
Hmm, I have never looked for the larger size and I don’t remember seeing any at the Dollar Store. But I will keep my eyes peeled and let you know if I find any.